
简介
说真的现在的网盘真的是垃圾垃圾垃圾各种限速,各种会员比如百度云盘
那为什么不自己搭建一个网盘,朋友的 推荐是owncloud,那么就来搭建一下
安装lnmp
首先要安装lnmp,下面先列一下owncloud的环境要求
- Operating System:Ubuntu 16.04, Debian 7 and 8, SUSE Linux Enterprise Server 12 and 12 SP1, Red Hat Enterprise Linux/Centos 6.5 and 7
- Database:MySQL or MariaDB 5.5+, Oracle 11g, PostgreSQL, & SQLite
- Web server:Apache 2.4 with mod_php
- PHP Runtime:PHP (5.6+ or 7.0+)
为了方便我就使用lnmp一键安装包来安装了
先下载screen
yum install screen
这个是为了防止网络中断导致安装中断
之后创建一个会话来安装lnmp
screen -S lnmp
接着下载安装脚本
wget http://soft.vpser.net/lnmp/lnmp1.4.tar.gz
之后解压
tar -zxvf lnmp1.4.tar.gz
[root@iZuf65l667kvowasvo93k6Z ~]# cd lnmp1.4
[root@iZuf65l667kvowasvo93k6Z lnmp1.4]# ls
addons.sh  ChangeLog  conf  include  init.d  install.sh  License  lnmp.conf  pureftpd.sh  README  src  tools  uninstall.sh  upgrade1.x-1.4.sh  upgrade.sh
执行那个install.sh就好了
./install.sh
+------------------------------------------------------------------------+
|          LNMP V1.4 for CentOS Linux Server, Written by Licess          |
+------------------------------------------------------------------------+
|        A tool to auto-compile & install LNMP/LNMPA/LAMP on Linux       |
+------------------------------------------------------------------------+
|           For more information please visit https://lnmp.org           |
+------------------------------------------------------------------------+
You have 5 options for your DataBase install.
1: Install MySQL 5.1.73
2: Install MySQL 5.5.56 (Default)
3: Install MySQL 5.6.36
4: Install MySQL 5.7.18
5: Install MariaDB 5.5.56
6: Install MariaDB 10.0.30
7: Install MariaDB 10.1.23
0: DO NOT Install MySQL/MariaDB
Enter your choice (1, 2, 3, 4, 5, 6, 7 or 0): 4
You will install MySQL 5.7.18
===========================
Please setup root password of MySQL.(Default password: root)
Please enter: 你的密码
MySQL root password: 你的密码
===========================
Do you want to enable or disable the InnoDB Storage Engine?
Default enable,Enter your choice [Y/n]:
No input,The InnoDB Storage Engine will enable.
===========================
You have 6 options for your PHP install.
1: Install PHP 5.2.17
2: Install PHP 5.3.29
3: Install PHP 5.4.45
4: Install PHP 5.5.38 (Default)
5: Install PHP 5.6.31
6: Install PHP 7.0.21
7: Install PHP 7.1.7
Enter your choice (1, 2, 3, 4, 5, 6 or 7): 7
You will install PHP 7.1.7
===========================
You have 3 options for your Memory Allocator install.
1: Don't install Memory Allocator. (Default)
2: Install Jemalloc
3: Install TCMalloc
Enter your choice (1, 2 or 3):
No input,You will not install Memory Allocator.

Press any key to install...or Press Ctrl+c to cancel
回车安装
你可以输入ctrl+a+d来退出这个会话。输入screen -r来进入这个会话
安装时间视配置来决定
============================== Check install ==============================
Checking ...
Nginx: OK
MySQL: OK
PHP: OK
PHP-FPM: OK
Clean src directory...
+------------------------------------------------------------------------+
|          LNMP V1.4 for CentOS Linux Server, Written by Licess          |
+------------------------------------------------------------------------+
|           For more information please visit https://lnmp.org           |
+------------------------------------------------------------------------+
|    lnmp status manage: lnmp {start|stop|reload|restart|kill|status}    |
+------------------------------------------------------------------------+
|  phpMyAdmin: http://IP/phpmyadmin/                                     |
|  phpinfo: http://IP/phpinfo.php                                        |
|  Prober:  http://IP/p.php                                              |
+------------------------------------------------------------------------+
|  Add VirtualHost: lnmp vhost add                                       |
+------------------------------------------------------------------------+
|  Default directory: /home/wwwroot/default                              |
+------------------------------------------------------------------------+
|  MySQL/MariaDB root password: 你的密码                          |
+------------------------------------------------------------------------+
+-------------------------------------------+
|    Manager for LNMP, Written by Licess    |
+-------------------------------------------+
|              https://lnmp.org             |
+-------------------------------------------+
nginx (pid 10396 10394) is running...
php-fpm is runing!
 SUCCESS! MySQL running (10924)
Active Internet connections (only servers)
Proto Recv-Q Send-Q Local Address               Foreign Address             State
tcp        0      0 0.0.0.0:3306                0.0.0.0:*                   LISTEN
tcp        0      0 0.0.0.0:80                  0.0.0.0:*                   LISTEN
tcp        0      0 0.0.0.0:22                  0.0.0.0:*                   LISTEN
Install lnmp takes 68 minutes.
Install lnmp V1.4 completed! enjoy it.
出现上面界面表示安装完成
安装owncloud
首先下载owncloud
wget https://download.owncloud.org/community/owncloud-10.0.2.tar.bz2
接着解压
unzip owncloud-10.0.2.zip
之后放入一个站点文件夹中
mv owncloud /home/wwwroot/
接着配置nginx
cd /usr/local/nginx/conf/vhost/
vim owncloud.conf
输入下面内容
upstream php-handler {
    #server 127.0.0.1:9000;
    server unix:/tmp/php-cgi.sock;
}

server {
    listen 80;
    server_name 106.14.192.149;

    # Add headers to serve security related headers
    # Before enabling Strict-Transport-Security headers please read into this topic first.
    #add_header Strict-Transport-Security "max-age=15552000; includeSubDomains";
    add_header X-Content-Type-Options nosniff;
    add_header X-Frame-Options "SAMEORIGIN";
    add_header X-XSS-Protection "1; mode=block";
    add_header X-Robots-Tag none;
    add_header X-Download-Options noopen;
    add_header X-Permitted-Cross-Domain-Policies none;

    # Path to the root of your installation
    root /home/wwwroot/owncloud;

    location = /robots.txt {
        allow all;
        log_not_found off;
        access_log off;
    }

    # The following 2 rules are only needed for the user_webfinger app.
    # Uncomment it if you're planning to use this app.
    #rewrite ^/.well-known/host-meta /public.php?service=host-meta last;
    #rewrite ^/.well-known/host-meta.json /public.php?service=host-meta-json last;

    location = /.well-known/carddav {
        return 301 $scheme://$host/remote.php/dav;
    }
    location = /.well-known/caldav {
        return 301 $scheme://$host/remote.php/dav;
    }

    location /.well-known/acme-challenge { }

    # set max upload size
    client_max_body_size 16400M;
    fastcgi_buffers 64 4K;
    fastcgi_read_timeout 600;
    client_body_buffer_size 1048576k;
    client_body_temp_path /tmp/owncloud;

    # Disable gzip to avoid the removal of the ETag header
    gzip off;

    # Uncomment if your server is build with the ngx_pagespeed module
    # This module is currently not supported.
    #pagespeed off;

    error_page 403 /core/templates/403.php;
    error_page 404 /core/templates/404.php;

    location / {
        rewrite ^ /index.php$uri;
    }

    location ~ ^/(?:build|tests|config|lib|3rdparty|templates|data)/ {
        return 404;
    }
    location ~ ^/(?:\.|autotest|occ|issue|indie|db_|console) {
        return 404;
    }

    location ~ ^/(?:index|remote|public|cron|core/ajax/update|status|ocs/v[12]|updater/.+|ocs-provider/.+|core/templates/40[34])\.php(?:$|/) {
        fastcgi_split_path_info ^(.+\.php)(/.*)$;
        include fastcgi_params;
        fastcgi_param SCRIPT_FILENAME $document_root$fastcgi_script_name;
        fastcgi_param PATH_INFO $fastcgi_path_info;
        #fastcgi_param HTTPS on;
        fastcgi_param modHeadersAvailable true; #Avoid sending the security headers twice
        fastcgi_param front_controller_active true;
        fastcgi_pass php-handler;
        fastcgi_intercept_errors on;
        fastcgi_request_buffering off; #Available since nginx 1.7.11
    }

    location ~ ^/(?:updater|ocs-provider)(?:$|/) {
        try_files $uri $uri/ =404;
        index index.php;
    }

    # Adding the cache control header for js and css files
    # Make sure it is BELOW the PHP block
    location ~* \.(?:css|js)$ {
        try_files $uri /index.php$uri$is_args$args;
        add_header Cache-Control "public, max-age=7200";
        # Add headers to serve security related headers (It is intended to have those duplicated to the ones above)
        # Before enabling Strict-Transport-Security headers please read into this topic first.
        #add_header Strict-Transport-Security "max-age=15552000; includeSubDomains";
        add_header X-Content-Type-Options nosniff;
        add_header X-Frame-Options "SAMEORIGIN";
        add_header X-XSS-Protection "1; mode=block";
        add_header X-Robots-Tag none;
        add_header X-Download-Options noopen;
        add_header X-Permitted-Cross-Domain-Policies none;
        # Optional: Don't log access to assets
        access_log off;
    }

    location ~* \.(?:svg|gif|png|html|ttf|woff|ico|jpg|jpeg)$ {
        try_files $uri /index.php$uri$is_args$args;
        # Optional: Don't log access to other assets
        access_log off;
    }
}
这样nginx就配置好了,注意的是如果fastcgi_pass unix:/tmp/php-cgi.sock这个配置错误,那么就会报502错误
接着配置数据库
mysql -uroot -p
创建一个数据库
create database owncloud;
在浏览器中输入你的地址访问
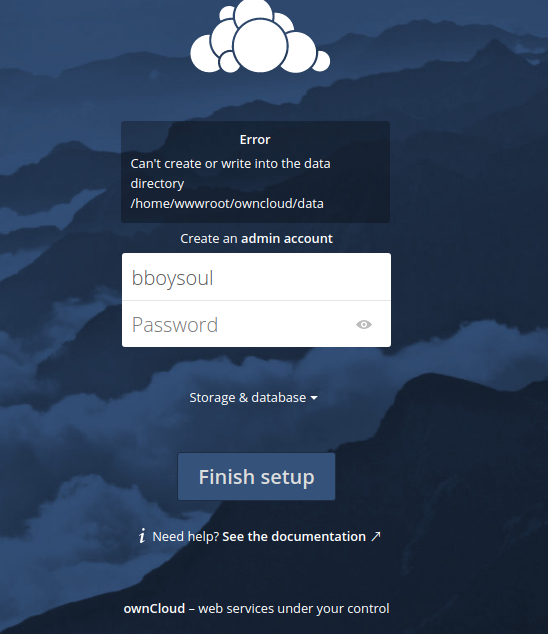
如果出现上面的错误,那么就要把你的那个目录的权限修改一下
比如
chown www:www owncloud/
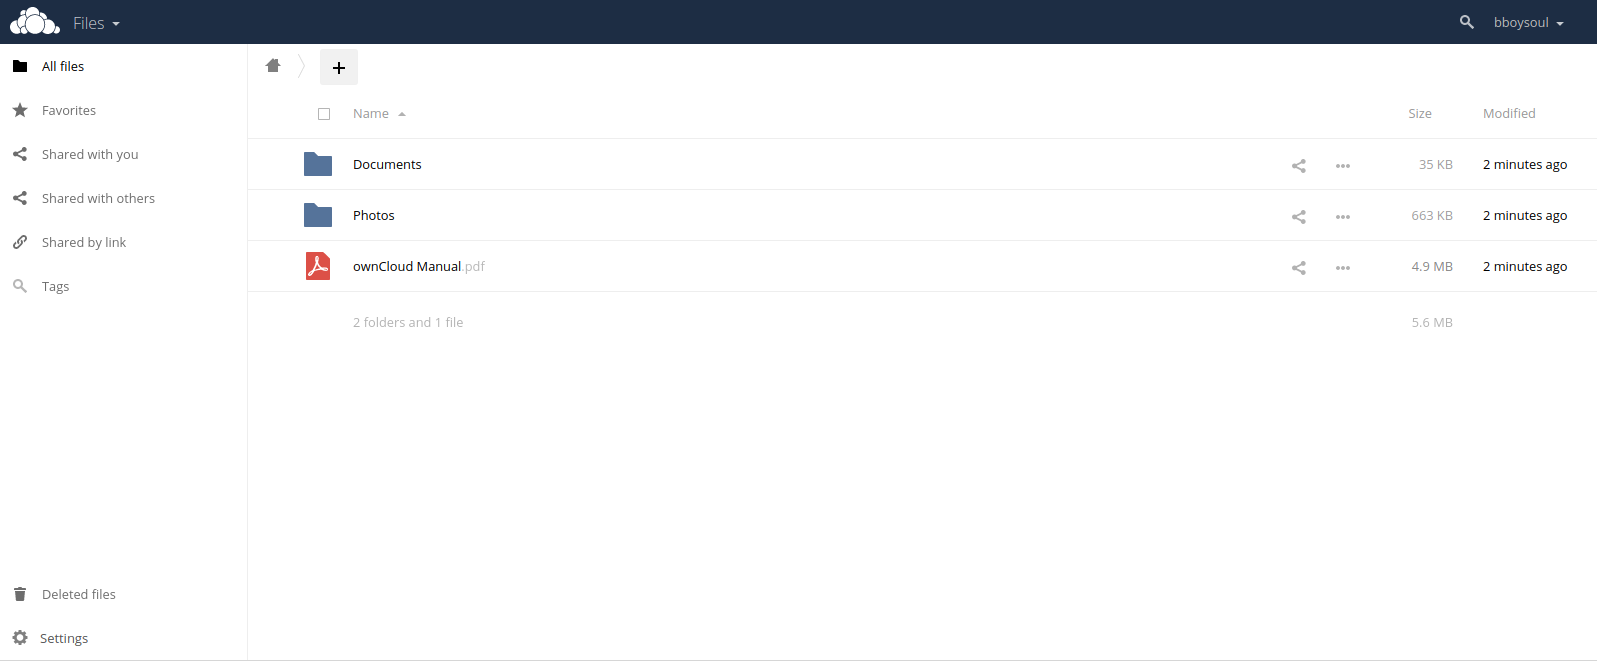
点击storge&database设置你的数据库,(玩玩用sqlite就好了,生产用mysql,mysql配置我就不说了)然后设置你的管理员账号和密码,之后就可以登录了
客户端
owncloud的客户端是全平台的,连linux都有,所以66666666,因为我是ubuntu的所以就安装ubuntu了
输入下面命令
sudo sh -c "echo 'deb http://download.opensuse.org/repositories/isv:/ownCloud:/desktop/Ubuntu_16.04/ /' > /etc/apt/sources.list.d/owncloud-client.list"
加入软件源
然后加入秘钥
wget -nv http://download.opensuse.org/repositories/isv:ownCloud:desktop/Ubuntu_16.04/Release.key -O Release.key
sudo apt-key add - < Release.key
更新软件源
sudo apt-get update
安装owncloud
sudo apt-get install owncloud-client
之后打开客户端,会让你设置server address
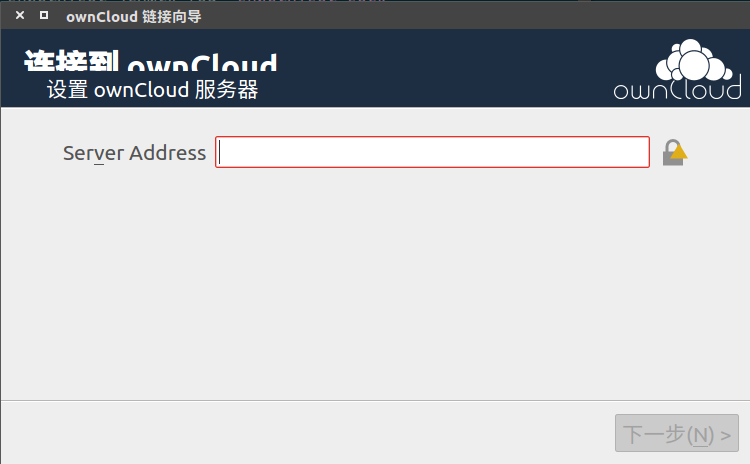
如果出现
Error downloading https://myip/owncloud/status.php - server replied: Internal Server Error"
这样的错误请重启一下php-fpm
Have Fun